| Article Body | Learn essential Toast Web configurations for going live! Select the button below to start this learning path.
Get Started With Toast Web
In this Article:
One of the most powerful menu tools in Toast Web is the Advanced properties page. It provides an at-a-glance view into your menu, and allows you to apply configuration settings to multiple parts of your menu at once. This is very useful if you need to apply tax rates to different parts of your menu, menu item descriptions, visibility settings, prep stations, and sales categories all on one page.
To use Advanced properties, follow these steps:
- In Toast Web, navigate to Menus > Bulk management > Advanced properties.
- The advanced properties page lists all the components of your menu: menus, groups, items, etc. Use the arrow (>) icons on the left side of the menu names to expand and collapse sections of your menu as needed to see the different elements you want to edit.
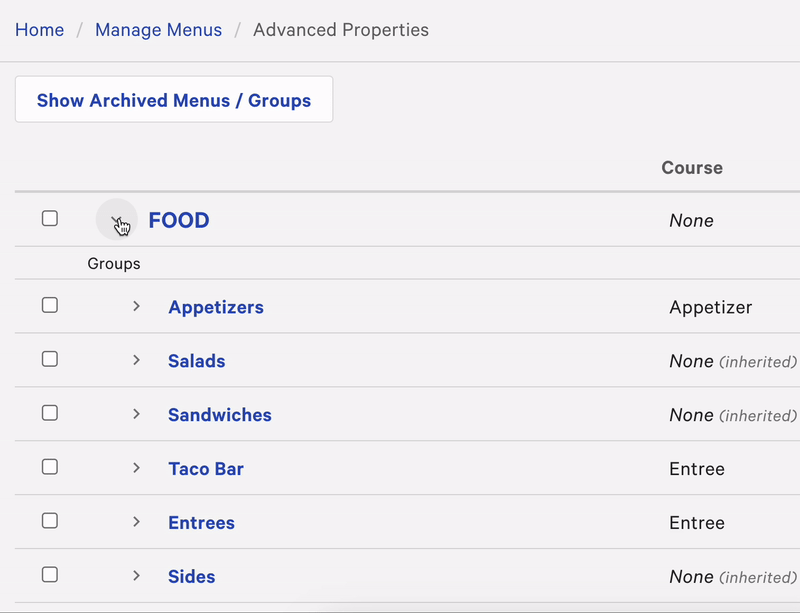
You can also select the name of a menu, group, item, modifier, etc. to open the menu details page for additional settings.
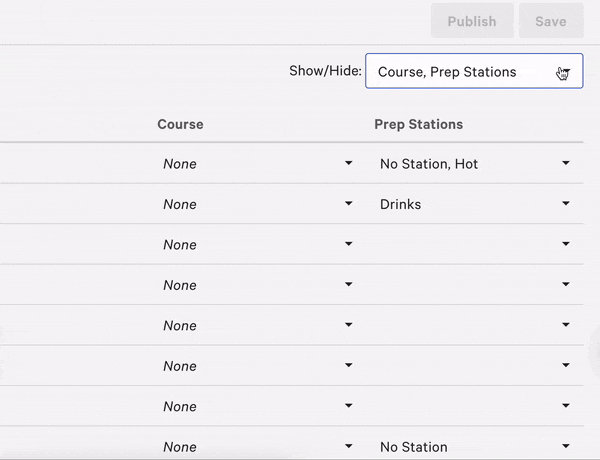
- Select the Show/Hide drop-down menu on the top right corner of the page. This list shows all the available settings that are viewable or editable through advanced properties. Once an option is selected, it will appear as a column on the advanced properties table and changes can be made in the text fields.
The section below covers the settings that are accessible via advanced properties.
- After applying any changes on the advanced properties page, make sure to save and publish your changes to push your updates to all of your ordering channels (POS, Toast Online Ordering, etc.).
Back to top
Each setting accessible from the advanced properties Show/Hide menu is listed below:
- Properties
- Name -The name of the group or item on the menu. If no other name fields are populated, this is the name of the menu component shown.
- Number - Every item has a unique item ID number. The MID# is used for reporting purposes but is most relevant to Enterprise customers with multiple locations.
- POS Name - A shortened/abbreviated name that appears to staff using the POS terminal. This is not the name used for reporting. POS names can be a visual aid for staff to increase their speed when placing orders. For example, if a menu item's name is "Californian Chicken Sandwich", a POS Name of "CHX SAND" can be entered to abbreviate the amount of text shown on the button on the Quick Order screen.
- Kitchen Name - The name as it appears to the staff in the kitchen. This can be a visual aid for staff in the kitchen to increase their efficiency. For example, if the item's name is "Molten Chocolate Lava Cake", a kitchen name of "Lava Cake" can be entered to abbreviate the text on the kitchen ticket.
- Description - A description of the menu item. These descriptions will appear in your digital ordering menu and Online Ordering menu, as well as in the item details screen on the POS. Here, you can enter the ingredients included in each item, including any important allergy information. Note: Group-level descriptions will not appear on your Toast Online Ordering page.
- Calories - Allows you to enter caloric information for each menu item or modifier. At this time, calorie counts can only be seen in the Nightly Menu JSON export. Keep an eye out for future releases to see this feature in Online Ordering, Kiosk, and on your Toast devices!
- Visible To - Determines whether the menu, group, or item shows on the POS, on Kiosk, on your Toast Online Ordering page, or with online ordering partners.
- Prompt for Quantity - Require a prompt for the server to enter a numeric quantity when ordering items. This can be helpful if there are items on your menu that can be ordered by the pound or in multiple quantities, like BBQ Pulled Pork or Lobster Tails.
- SKU - Quickly enter SKUs for all items in one place.
- PLU - Quickly enter PLUs for all items in one place.
- Inventory - Manage current inventory quantities. This allows you to quickly mark items as out of stock or place counts on daily specials so you don't oversell a limited item. To learn about the various ways of updating your inventory count, check out this Toast Central article Troubleshoot Item Count.
- Modifier Ordering Priority - Control the order of modifiers as they appear on kitchen tickets/KDS.
- Preparation
- Course - Select/edit/update what course each menu, group, or item belongs to.
- Prep Stations - Select/edit/update what station the menu, group, or items are sent to when ordered.
- Prep Time - Enter the time, in seconds, that it takes to prepare an item or modifier.
- Sort Order - Identify sort order for appearance on KDS and printed kitchen tickets.
- Scanning
- Embedded Amount Type - Choose between price, price-composed, and weight.
- Weighing
- Tare Weight - Set weight of items that use containers to hold food.
- Unit of Measure - Choose between pounds (lb), ounces (oz), kilograms (kg), or grams (g) for weighed items.
- Reporting
- Sales Category - If you've created sales categories to organize your sales reporting, manage the category a group or item belongs to here
- Discounting
- Can be discounted? - Select whether or not the menu, group, or item is eligible to have a discount applied
- Rewards
- Exclude from Rewards program? - Select whether or not the menu, group, or item is eligible to accrue Loyalty/rewards points
- Taxes
- Applicable Taxes - Select which tax(es) apply to a group or item. (e.g. state, local, state and local)
- Tax Inclusion Option - Edit/update if the price in Toast includes tax or if it's added at the payment step.
- Dining Option Tax (California) - Manage applicable taxes based on California's 80/80 Exemption Law (No Tax for Takeout).
If your restaurant uses multi-location management (MLM), be aware that the Target and Owner fields will be locked on the advanced properties page.
|
|
|---|

