Looking for a live training experience with a Toast Training Expert? Sign up for a live Toast Classroom session to help you set-up and get started with Online Ordering! Select the button below to sign up.
Toast Classroom - Getting Started With Online Ordering
Own your profits and guest relationships by allowing guests to easily order pickup or delivery directly from you – commission-free.
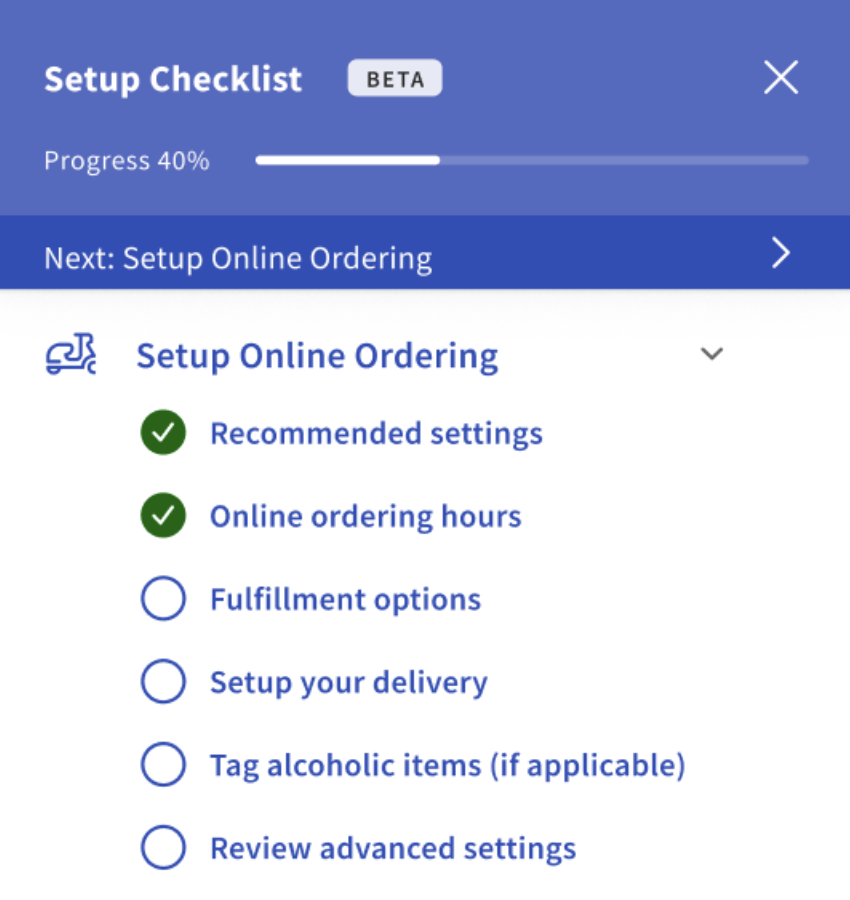
Log in to Toast Web and then select the button below for a step-by-step walkthrough of online ordering setup in your Toast account by following the onboarding checklist which also includes setting up delivery.
Or, use the written instructions listed in this article to get Toast Online Ordering up and running.
In this Article:
First, you'll need to optimize your menu for online ordering. Often you have menus, groups and/or items that cannot be ordered online, so you'll need to set menu item availability.
To make changes to your menu item availability, use the following workflow.
- Log in to Toast Web and navigate to Menus > Menu management > Menu manager.
- Select the menu you would like to adjust.
- The menu settings panel will appear on the right side of the screen. Scroll down to the Channel visibility section and ensure that Toast Online Ordering, Toast Takeout App is toggled On for any menus that should be visible for Toast Online Ordering. Watch this video to learn more about visibility settings.
- Select Save and Publish all changes to complete the setup.
- Repeat the steps above to manage visibility settings for all menus, menu groups, menu items, and modifier groups.
Note: As you start to take online orders, we advise reviewing your Quote Time Strategy to ensure your kitchen capacity calculation is now accounting for Online Orders.
Back to top
Once you have order auto-firing enabled on one device at your restaurant location, you can select your preferred Online Ordering settings.
Note: These settings are done in Toast Web. We recommend completing these steps in Toast Web for your restaurant while going through this guide simultaneously.
Back to top
First, you must turn on online ordering to accept online orders. This is also where you can temporarily snooze or disable online orders if needed.
- In Toast Web, navigate to Takeout & delivery > Availability > Online Ordering.
- Next, locate the Toggle Online Ordering header and select Accept online orders for the Accept Online Orders setting.

- Then save and publish your changes.
Online ordering is now enabled, and your guests can place orders when your schedule is open.
Back to top
The Approval section is where you set the behavior for incoming online orders and how they are received at your location.
- Approve manually: This pushes all incoming orders into Pending Orders Mode on your POS. All orders will need to be manually approved here before being submitted to the kitchen.
- Approval emails: If a guest places an order and it is not approved within five minutes, an email will be sent to the guest advising them to call the restaurant to check on the order.
To access this screen, select the back arrow in the top left corner of your device and choose Pending Orders under the Mode section of the device menu.
From the Needs Approval tab, you can select any incoming online orders listed and select Approve in the top right corner of the screen. Once approved, these orders will be fired to the kitchen.
-
Send orders directly to the kitchen: This pushes all incoming orders directly to the kitchen when they are ready to be prepared. With this setting, you will not need to manually approve any orders. As best practice, Toast recommends using this option. Note
that this setting requires
Order Auto-Firing to be enabled on exactly one Toast device.
-
Use rules: This setting uses preset rules to determine if the order should be sent directly to the kitchen and requires order approval through the Pending Orders Mode or they will be automatically rejected. Note that this setting requires
Order Auto-Firing to be enabled on exactly one Toast device.
If you select Use rules for your desired approval method, the Approval Rules section will appear. You can choose the following rules:
The next step in online ordering setup is to set your dining options. This section allows you to choose whether diners will have the ability to order curbside pickup, takeout, or delivery from your online ordering menu.
You also have the option to add a customized message to your guest for takeout, curbside, and delivery orders.
-
A sample takeout message could be: "Thank you for your order! Please look for your order at the left hand counter."
-
-
A sample delivery message could be: "Thank you for your order! We will call you when your order is outside your door."

Once set up, the custom messaging will appear on the guest's order confirmation screen and e-receipt.
Note: It's important to specify dining options in the fields above. If Takeout Option and/or Delivery Option is set as Select, the online ordering hours will not be displayed properly on the online ordering hours page and guests will not be able to place orders using that dining option.
Back to top
Online orders from Toast Online Ordering can either be assigned to a specific employee or they can be assigned to the POS tablet that has order auto-firing enabled.
If Assigned by auto-firing tablet is selected, the check will always be assigned to the last employee to enter their passcode and sign into the order auto-firing device. It's important to note that orders will be assigned to the last employee to enter their passcode on the order auto-firing device even if the employee is now clocked out.

Note: We suggest setting up a generic "Online Ordering" employee to be used specifically for online orders, and select it as the Online Order Server. This will automatically assign this server to all online orders, regardless of who logs into the auto-firing device. For a guided walkthrough of this setup in your Toast account, log in to your Toast Web account and click the button below.
Or, check out this Toast Central article on Add and Edit Employees and Wages for Toast POS.
Back to top
Server Selection Options (Scheduled Third-Party Orders)
If your restaurant uses third-party ordering channels and has scheduled orders (orders set to be prepared at a future time), those orders may not be automatically assigned to a server in Toast. If you rely on server assignment for tip tracking or reporting, we recommend one of the following options:
- Assign a default server for online orders in your Toast Web configuration.
- Manually assign a server to the order after it is received.
Back to top
Online orders can be mapped to a new or existing revenue center, which is useful if you'd like online orders to be reported independently from other areas of revenue generation. Since revenue centers help you segment your sources of revenue in the restaurant, we recommend you create a revenue center called "Online Ordering." For a guided walkthrough of this setup in your Toast account, log in to your Toast Web and click the button below.
- In Toast Web, navigate to Front of house > Tables & sections > Revenue centers.
- Select +Add to create and name the Online Ordering revenue center.
- Save and publish your changes.
Now that we've created the "Online Ordering" revenue center, you can map online orders to it. Use the following workflow to do so:
- Navigate to Takeout & delivery > Availability > Online Ordering.
- From here, locate the Revenue Center header and under the Revenue Center Mapping drop-down menu, select Online Ordering.

Now, in your sales reports, all online orders will appear in the revenue center designated for online orders.
Online orders can also be mapped to existing revenue centers. For example, if you already have a revenue center for takeout/delivery orders and you'd like online ordering to be within that revenue center, you can do so by mapping your online orders to it as well.
Back to top
Next, you'll see the Special Requests header. This is where you can allow customers to add special requests to individual menu items when taking an online order. An example special request could be a customer asking for an extra side of sauce.
You can customize the message in the customer-facing text box. This is what the customer will see before they enter their special request. For example, "No substitutes. Additions may cost extra."

Note: Special requests apply to all menu items and cannot be specified for specific menu items at this time. There is currently no other way to add an open response request field for online orders.
Back to top
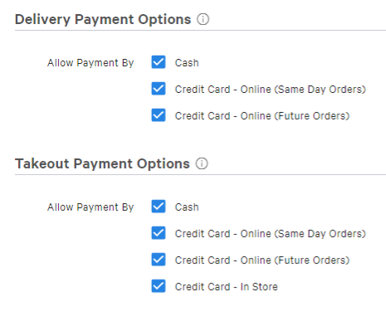
Delivery Payment Options allow you to determine whether customers can pay in-store and/or online, and what forms of payment they can use.
- Navigate to Takeout & delivery > Availability > Online Ordering.
- Under the Delivery Payment Options section, select the Cash or Credit card payment options you wish to offer guests.
- Save and publish any changes.
You also have the ability to allow or disable credit card tips. Selecting Allow tips allows customers who order online to add a tip to the order when paying by credit card. Note: At this time, it's not possible for guests to split a payment for an online order (e.g., pay for their order with two different credit cards).
Back to top
| Toast Delivery Services® (TDS) is unavailable in Canada, Ireland, and the U.K. at this time. Please check back for updates. |
If you choose to offer delivery for online orders placed in your restaurant, you'll need to set up delivery using your own drivers or using Toast Delivery Services. This can be done from the Other Setup section of Toast Web on the Takeout/Delivery page.
Note: You cannot use Delivery Using Your Own Drivers if you have signed up for Toast Delivery Services. You cannot toggle between the two services.
If you do not wish to offer delivery for online orders, proceed to the next step.
Back to top
In order to receive online orders, you will need to enable Order Auto-Firing on only ONE device at your restaurant location. Order auto-firing is a configuration within Toast POS that manages schedules and online orders to fire automatically to the kitchen when ready. Order auto-firing must be enabled for your restaurant to receive online orders straight to the kitchen.
Enable Order Auto-Firing in Toast Web for Online Ordering
- If Send Orders directly to kitchen or Use rules is selected as your approval method for online orders, you will then be prompted to select an auto-firing device. Select Update to continue.

- Toast will recommend a configured POS device to auto-fire. Select Update to continue or choose another device from the list if desired.
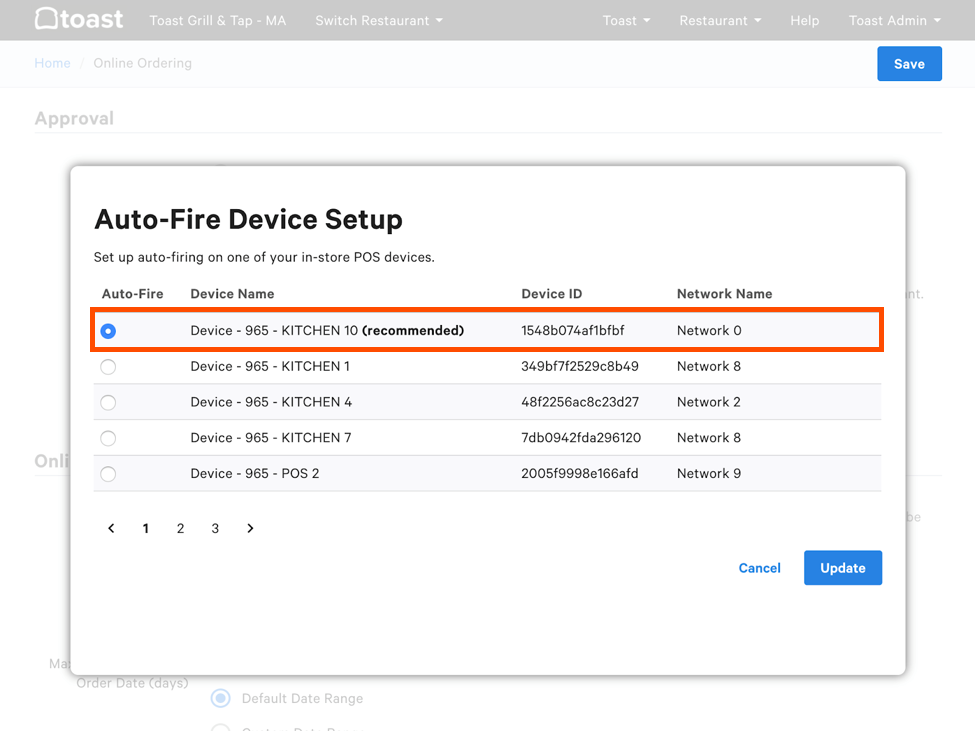
- Your selected device will appear next to Current Selection.
- Save and publish to finalize your changes.
Back to top
- In the main menu of the Toast app on the device you want to use for online orders, navigate to Setup > Device Setup.
- Select Order Auto-Firing.
- For Does this device manage scheduled orders or auto-approve any online orders?, select Yes and then select Continue.
Next, you have the ability to set the hours you'd like to designate to online ordering. For example, if guests are able to order online at your restaurant from 10:00 a.m. - 10:00 p.m., but online ordering is unavailable anytime after 10:00 p.m., this is the section where you can set that up. You'll also be able to set up different takeout and delivery hours for each day of the week if needed. For a guided walkthrough of this setup in your Toast account, log in to your Toast Web and select the button below.
Note: Setting up the hours for online ordering is different than setting up the hours for your restaurant. Restaurant operating hours will be used by default but Toast recommends reviewing this schedule before setting your online ordering hours to ensure times align properly.
To set hours of service for online ordering:
- Navigate to the Takeout & delivery page found on the left-hand side of Toast Web. Locate the Online ordering hours section on the page. timezone
- Under the Online ordering hours header, select either the pencil icon to make changes to the day of the week or use the toggle to turn on/off orders for the day.

- By selecting the +Add interval button, you can add time intervals to accommodate for busy peaks on a specific day.
- To apply the same hours to other days of the week, select the day(s) under Apply these hours to other days for any applicable days.
- Schedules can also be edited to include days that you are closed by selecting the Closed all day check box.
- Then select Update to save your changes.

- You can select + Add override to add custom hours for specific dates, for example, for the holidays.
- You can also customize the cut-off time for your guests to place an online order, depending on when your restaurant closes. For more information, check out the Adjust Order Cut-Off Time section of this Toast Central article, Manage Your Takeout and Delivery Schedule.
- If you'd like to allow your guests to schedule an order for a future date, check out this Toast Central article, Schedule Future Orders, for more details on setup.
|
|
Overrides are applied to the dining option, which is set in Toast Web here. For example, if an override is set for Takeout & Third-party delivery, the override will be set for pickup (including curbside), Toast Delivery Services, and third-party integration (Uber Eats, DoorDash, and Grubhub). It will not be automatically set for First-party delivery. Learn more in the Schedule Overrides section of this Toast Central article, Manage Your Takeout and Delivery Schedule. |
Note: On the guest's view, the restaurant hours listed in the More info section will show the restaurant's pickup and delivery hours with additional information such as operating hours and phone number. Therefore, if online ordering is turned off or an order is placed outside of your online ordering hours listed but your restaurant is still open for dine-in, your online ordering page will read as "closed" although your hours will show as "Open" in the View hours section of your online ordering page.

Back to top
Customize your online ordering page by adding your restaurant logo and creating a Toast Tab URL.
- In Toast Web, navigate to Takeout & delivery and select Restaurant info in the Toast Online Ordering section under Related Settings.

- Restaurant Logo: Select Choose Image and upload the image you would like to use as your restaurant logo. This image needs to be a PNG file.
- Pro Tip: For best results, it's recommended to use a square image that is at least 180 pixels by 180 pixels.
- Banner Image: Select Choose Image to upload your banner image. It needs to be a PNG file. This is the main image that appears on your Online Ordering site.
- Create your Toast Tab Page URL: This is your online ordering website. The URL begins with http://www.toasttab.com/, but the rest is up to you. This is the link you will use to direct your customers to your Online Ordering site.

- Once your images have been uploaded, save and publish your changes.
To learn more about customizing your online ordering site, check out this Toast Central article on Customize Your Online Ordering Site.
Back to top
Best Practices for Test Orders
- Avoid Costs: Ensure to void or cancel your test orders after verifying functionality to avoid incurring costs.
- Test Transaction Mode: Use Test Transaction Mode to bypass charges while testing different payment scenarios.
Back to top
Place the Test Order
After you have finished setting up your online ordering site, it's recommended to place a test order to ensure online ordering approval and printing options are correctly configured. To place a test order, first notify your staff that you will be placing an order that you do not wish to be made in the kitchen. Then, follow the steps below:
- In Toast Web, navigate to Takeout & delivery and select Online ordering setup in the Toast Online Ordering section under Related Settings.
- Then, scroll down to Delivery or Takeout Payment Options and enable Cash by selecting the check box.
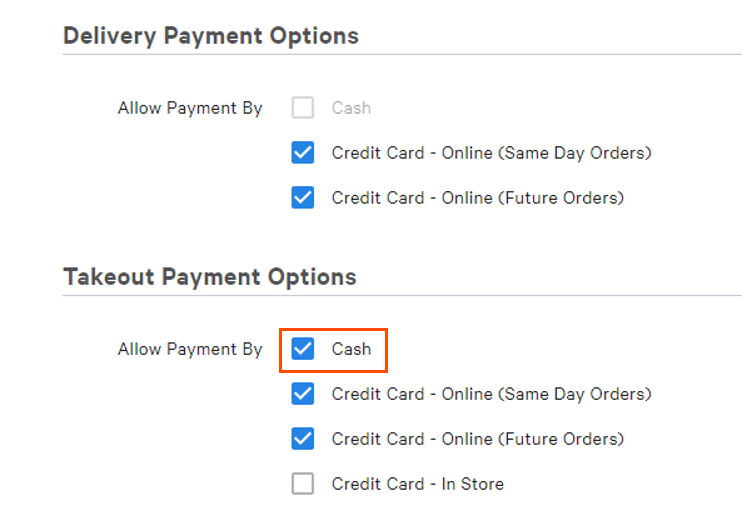
- Save and publish your changes.
- Then, navigate to your Online Ordering URL in a different tab and select items off of your menu to add to your cart, just like a guest would.
- Note: Be sure to select the dining option that has cash enabled as a payment option for your test order. We also recommend selecting a varied range of items and modifiers to verify all prep stations are printing correctly.
- Select Checkout and follow the prompts on the screen. Once you arrive at the Payment Method section, select Cash.
- If you have any active discounts with a promo code that you wish to test, enter the code in the Promo Code field.
- Then, if you have online ordering tips enabled, you may select a recommended tip option before submitting your order.
- Select Submit to place your order. You will receive an order summary message if the order has been placed successfully.
- Depending on your approval method selected, the order will now appear on the Pending Orders screen under the Needs Approval tab or will be sent automatically to the kitchen.
- Then, find the test order on your POS device and select the three-dot overflow menu in the top right corner of the screen.
- Select Void Order and enter a valid void reason if applicable.
Need a refresher on how to void an entire check? Check out the Void an Entire Check section of this Toast Central article, Void Items, Payments, and Checks.
When guests place orders, they can select Express checkout with Toast or Checkout as guest. On the next screen, the guest will enter, review, and/or edit their personal and payment info before submitting the order. (Note: Express checkout is not available for customers outside the U.S. at this time.)
When finished, don't forget to return to the Online ordering setup page and disable Cash payments if you do not wish to offer them for online orders. If any additional settings need adjusting, don't forget to save and publish your changes!
Want to learn more about online ordering setup and best practices? Check out this on-demand training guide.
Back to top
Place a Test Order for Third-Party Ordering
Place a DoorDash Test Order
- Create a Test Order: Use the DoorDash portal to create a test order. Opt for takeout instead of delivery to easily verify the workflow.
- Verify Appearance: Ensure the test order displays correctly on the Kitchen Display System (KDS) or prints a ticket. Review settings if issues occur, particularly regarding Ticket Display Options.
- Contact DoorDash Directly: For additional guidance, reach out to DoorDash for specific instructions on performing test orders.
Back to top
Place an Uber Eats Test Order
- Place a Test Order: Log in to your Uber Eats account and place a real order like a customer.
- Alternative Option: If Uber Eats does not support test functionality, consider placing a real order yourself and refunding it afterward, or wait for a guest’s live order.
Back to top
Back to top

