In this Article:
Independent Prep Station Overview
By default, items mapped to multiple prep stations will all fulfill (or bump) from all prep stations at the same time. However, when a menu item contains ingredients that are prepared at different prep stations, each prep station may want to fulfill their portion of the item without fulfilling (bumping) ingredients that are prepared at another prep station.
This can be accomplished by enabling independent prep station fulfillment in Toast Web.
 | Independent prep station fulfillment is a new setting available in your Toast Web setup. To get access to the fulfillment method setting, please reach out to your Onboarding Consultant or contact Customer Care. If you've used the legacy workaround previously, you can find those instructions further down in this article. |
Back to top
Once the independent prep station fulfillment option has been enabled for your account, you can follow these steps to configure it:
- In Toast Web, navigate to Kitchen > Printers, tickets, & KDS devices > Kitchen.
- Scroll down to the Ticket Screens section and find the Fulfillment method setting. Select Fulfill at each station independently.

Note: If you don't see this setting on the Kitchen page, it may not be enabled for your restaurant yet. Contact your Onboarding Consultant or Customer Care and ask them to enable the independent prep stations setting for your restaurant.
- For the Other Stations, you can select For each ticket, list other stations working on that ticket if desired.
- Save and publish your changes.
Back to top
When an item is being prepared at independent prep stations (in this example, Cold and Fry stations), it will be visible on each screen as shown below:
The ring/bell notification will sound once the item is fulfilled, and the item on the expo screen will turn green once all prep stations have fulfilled their portion of the ticket.
Note: The prep stations must be assigned as prep stations in Device Setup, or the independent prep station will not show the green checkmark
Back to top
Previous Workaround Instructions
This section provides instructions for the legacy (previously suggested) workaround that allows you to fulfill prep stations independently. With the new fulfillment method setting, this process is no longer necessary. If you are still using this previous workaround, keep in mind that as expected with any 'workaround,' there may be some unforeseen concessions for your restaurant. Learn more about prep station setup and functionality in Prep Stations Basics and Including Multiple Prep Stations' Items on a Kitchen Ticket.
For example, a Chicken Lettuce Wrap contains chicken filling and the lettuce wrap itself. The chicken is prepared at the Saute prep station and the lettuce is prepared at the Cold prep station.
| Ingredients | Prep Station |
| Chicken filling | Saute |
| Lettuce wrap | Cold |
In order to set up the workaround for independent fulfillment, you’ll need to map the different ingredients to separate stations. This can be done with default modifiers. Let's use this example menu below. A menu called Food, with a group called Mains, with an item called Lettuce Wrap:
For the following steps, you can either create the modifier group on the item if the ingredients are specific to that item (Lettuce Wrap), or you can create the modifier group for the group (Mains) if you want all items in the group to go to multiple stations and be fulfilled independently.
Lastly, before you start, the following assumes that you only have the item or group in question routed to 1 station. In this example, Lettuce Wrap is only routed to the Cold station. Remove the second station (Saute) if the item or group is routed to multiple stations.
- Create a modifier group (on the item or the group) with a name that will help you remember its purpose. This will sometimes become visible to staff but will also be visible to your Online Ordering guests. We suggest something like Kitchen Routing: Lettuce Wraps. Before saving, change Required? to Optional and check off Multi-Select.

- Save your changes.
- Create two modifier options within the modifier group and set the names to be the prep station that contains the other ingredients (example: Saute). The staff will never see this, however, guests will see this in Online Ordering. We suggest something like Saute: Leave this selected. Select the Default checkbox to make it a default modifier.
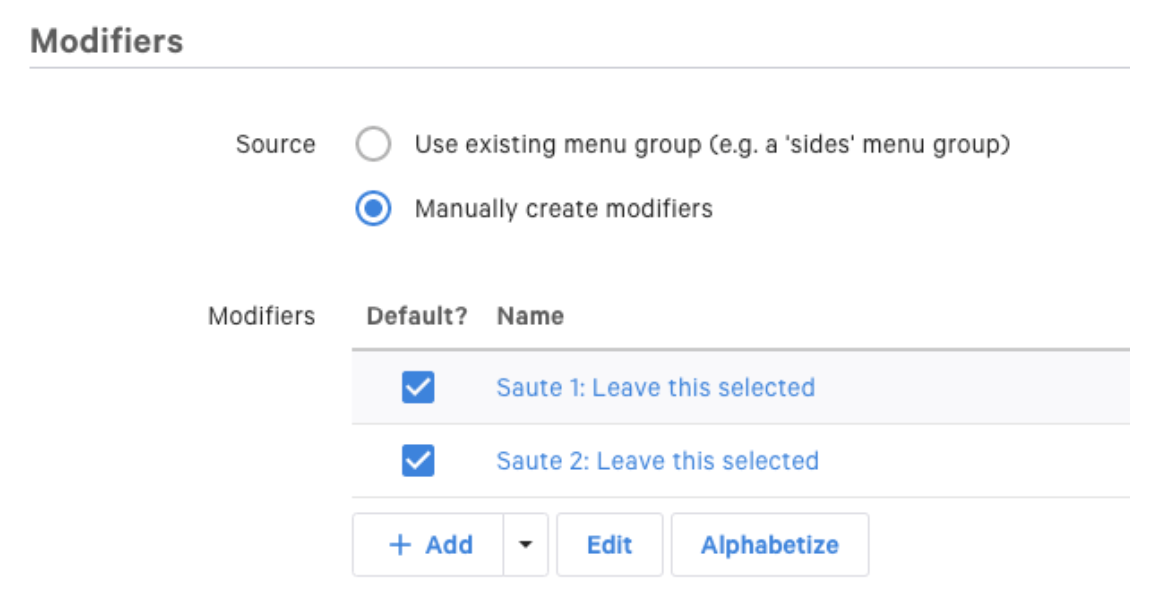
- Save your changes.
The following steps (5-8) need to be completed for both modifiers.
- Select one of the modifier options you just created and then select Edit item.
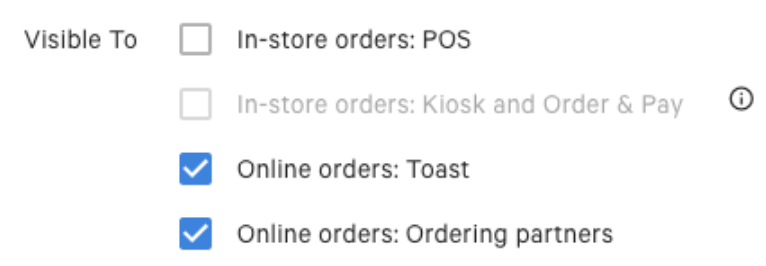
- Scroll down to the Visible To settings and deselect In-store orders: POS.
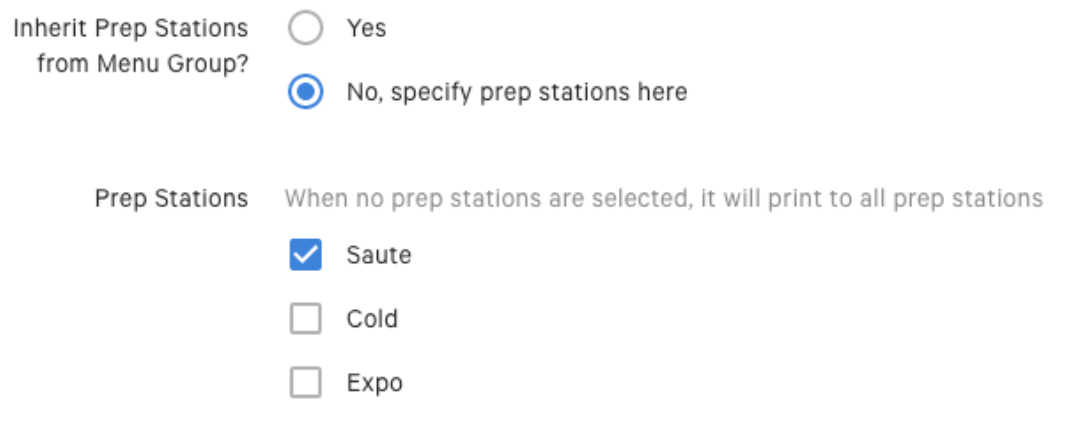
- Scroll down to the Preparation section and next to Inherit Prep Stations from Menu Group?, select No, specify prep stations here. Select the desired prep station from the list to apply to this modifier. In this case, the item, Lettuce Wrap, is already routed to the Cold prep station, so we're adding Saute to our modifier.
- Save and publish your changes.
- Repeat steps 1-8 for other items or groups or additional prep stations.
Note: Before testing, it's recommended that you navigate to Kitchen > Printers, tickets, & KDS devices > Kitchen in your back-end, and confirm the Modifier Routing setting (under the Printed Tickets and Ticket Screen section) is set to Print or show item with modifiers. This workaround is incompatible with the other modifier routing option.
Back to top
How Does the Workaround Function?
POS Ordering Screen
While entering one of these items, the staff member will see the modifier group amongst other required and optional modifier groups (side choice, dressing choice, etc). However, the modifiers (Saute) inside are invisible so there is nothing to interact with.
If there are no other modifier groups on or inherited by the item, the below screen will rarely be seen.
Back to top
KDS Screens
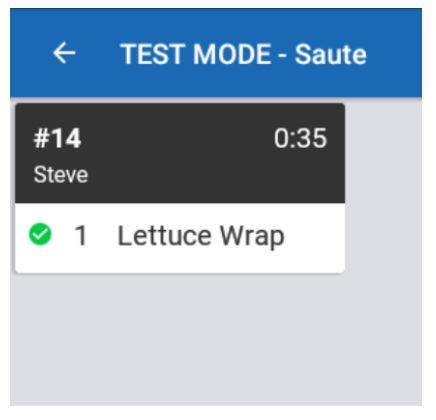
Using the Chicken Lettuce Wrap example, Cold and Saute prep stations will be able to fulfill their tickets independently without bumping the other station's ticket.
The item, Lettuce Wrap, is mapped to ONLY the Cold station, and the modifier options Saute 1 and Saute 2 are mapped to ONLY Saute station. However, the tickets will look very similar across KDS screens.
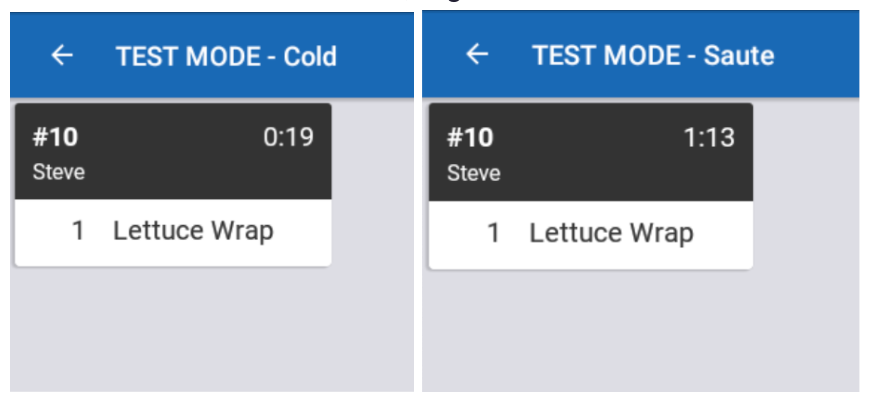
(Note that the image on the left is the Cold station, and the right is the Saute station.)
When the Cold station fulfills their ticket, the Saute station (and Expo, if you're using an expo station) will see a checkmark next to the item indicating that the Cold station has completed their part of the item. However, as we indicated above, this is a workaround. If you fulfill it in reverse order, the Cold Station will not show a checkmark.
Back to top
Online Ordering
After selecting the item, the default modifiers you've built will show up. The naming of the modifier is designed to deter a guest from deselecting the modifier. But, note that it is possible.
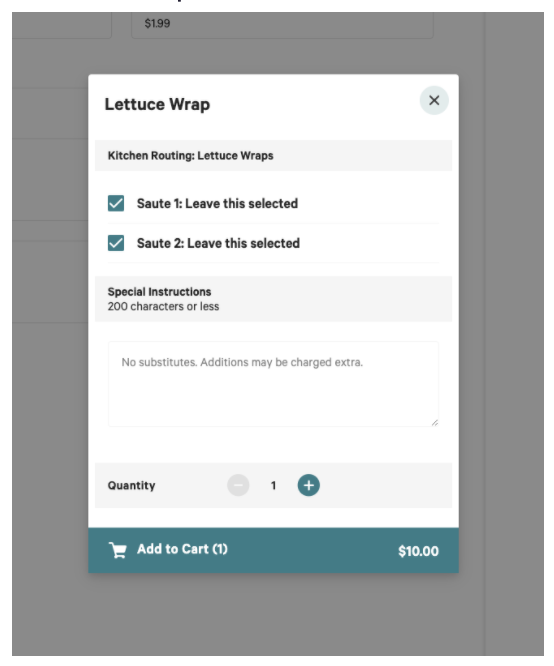
If the item has additional modifiers (side choice, dressing choice, etc.), then your Kitchen Routing modifier group will come up at the bottom of the list. This is designed to keep it out of sight for the guest, but please note that it can't be hidden entirely.
Orders placed via Online Ordering will function the same as the above example on the KDS screen.
Back to top


