Toast can support an unlimited number of additional and alternative payment options (non-cash/non-credit) to be accepted by your restaurant. Popular options include third-party order & delivery sites like Grubhub and Eat24, coupon and deal sites like Groupon and LivingSocial, advanced deposit reservation sites like OpenTable and SevenRooms, and paper gift certificates or money orders. Add any non-cash/non-credit option in Toast Web, and you can accept it on the POS and track the reports right away.
- In Toast Web, navigate to Payments > Payment methods > Other payment options.
- Select + Add to create a new Other Payment Option.
- Complete the information fields and select the appropriate configuration options for your new payment option:
- Name - This will be how the payment option appears on the payment screen of the POS.
- Description - This field is optional.
- Show on POS - Starting with Toast app version 2.67, this setting will determine whether the payment option appears on the POS. The default setting is Yes, but you may wish to select No if this payment option is not meant to be taken on the POS/in-store. This can help simplify the Other Payment Options menu on your POS to make for an easier payment-taking experience for your staff. It's recommended that any payment type that is meant to be used by an integration (e.g., Grubhub) be set to No for the Show on POS setting.
- Require Manager Approval - A manager would need to enter their passcode on the POS for an employee to apply this payment method.
- Allow Paid Check Status - When enabled, the check status changes from open to paid when this payment is tendered. The final amount charged might then be adjusted to add a tip. When the total charge is final, the check status changes from paid to closed. This is intended for payments like hotel room charges.
- Treat as Discount - If enabled, applying a partial balance as this payment type would not subtract from taxes due (as a discount would), and a receipt with the remaining balance due will print, if applicable.
- Tax Exempt - If enabled, applying this payment option would remove taxes from the entire check. This is intended for third-party order & delivery services, as they usually handle taxes on their end.
- Tips Enabled - If enabled, you'll have the ability to apply a tip by printing a tip line on a receipt or prompting the guest to enter a tip if digital receipts are enabled.
- Thank You Dialog - If enabled along with digital receipt mode, your guest will be shown the thank you dialog in digital receipts mode.
- Show Receipt Dialog - If enabled along with digital receipt mode, your guest would be able to select how they'd like their receipt: printed, emailed, texted, or none.
- Allow Rewards Program - When enabled, the payment type can be used with your Toast Loyalty rewards program to earn points.
- Save and publish your changes to see the new payment option on the POS payment screen!
You can also use the steps described below to set up a payment option if you expect some guests to pay with a paper check. You will be responsible for depositing checks into your bank account, the same way you handle cash. See the section on reporting to learn how to find these payment options displayed on your reports.
Back to top
To apply other payment types to a check on the POS:
- Navigate to the check you'd like to process an alternative payment for.
- Select the Pay ($) button.
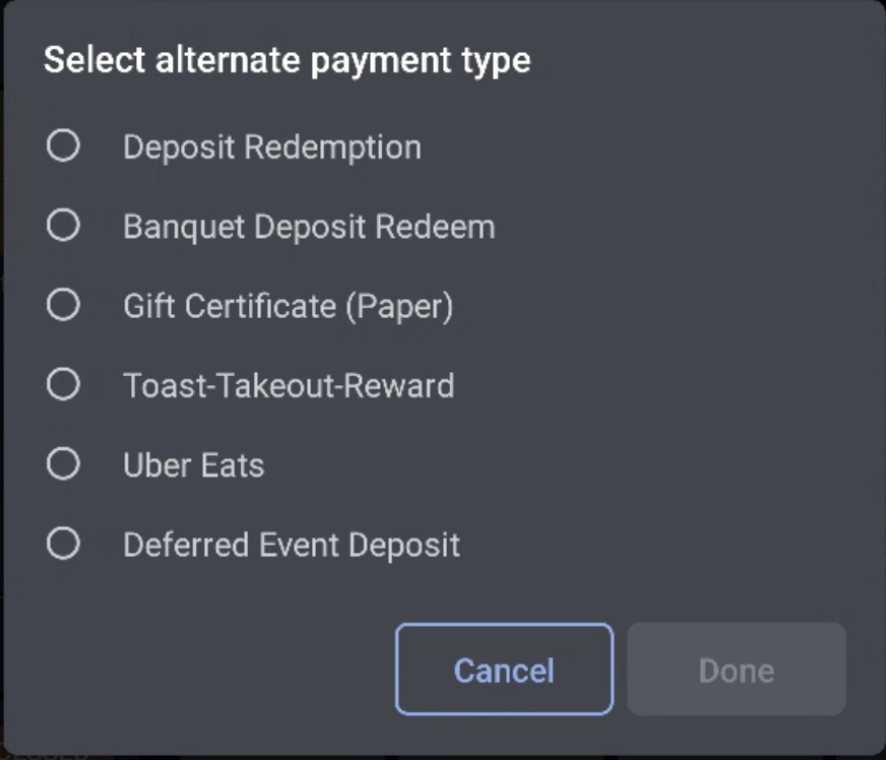
- From the Payment screen, select Other payments.
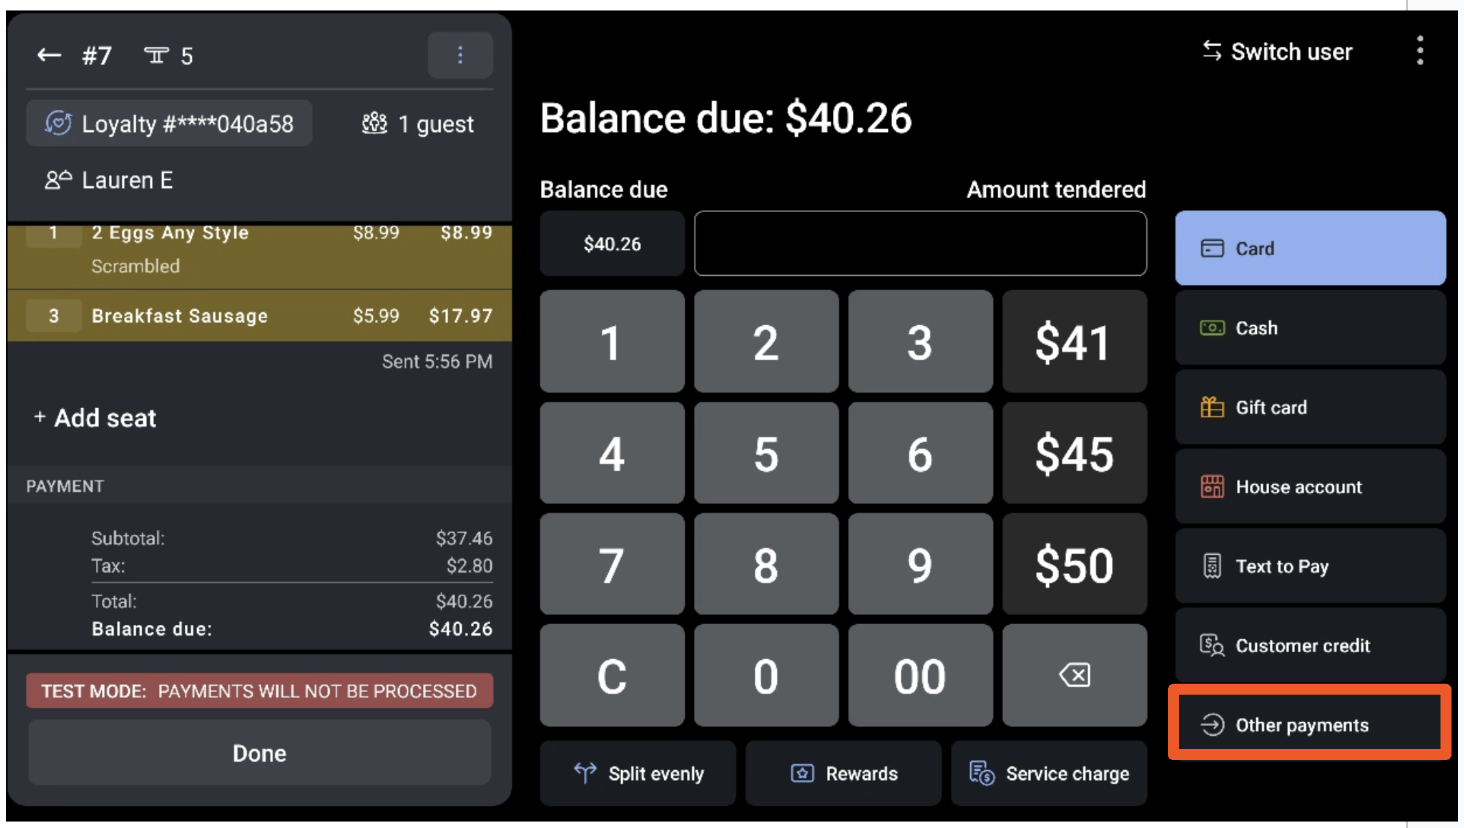
- Select an alternative payment type depending on your restaurant configuration, and then select Done.
- Guests can either select the tip and receipt options on their device, or a standard receipt will print.
Learn more about taking payments in this Toast Central article, Take Payments on the POS.
This method also works if you have a guest who wants to pay with a paper gift certificate for just part of the check. Your guest can deduct however much from their gift certificate that they wish. When the guest is ready to pay, enter the amount of money that they'd like to apply to the check (from the gift certificate) and select the Paper Gift Certificate payment option that you've set up. The guest can then pay the remaining balance with whichever tender they’d prefer.
If this gift certificate does not have any digital source (i.e., it has no barcode or serial number), you’ll need to devise a trustworthy way to accurately track your guest’s remaining balance, such as signing and dating it by hand.
Back to top
One way to view the payment option used for each check is on the Payments report.
- In Toast Web, navigate to Reports > Payments > Payments.
- The payment option will be displayed in the Type column. If that column is not visible, you can enable it by selecting Show/hide columns and checking the box next to Type.
To learn more about sales reporting, see this Toast Central article, Sales Reports Overview.
Back to top
Other Payment Options FAQ
How will these show on the POS if someone does select YES to have it show on the POS?
If set to YES (default value), there is no change on the POS from the current state. If set to NO, the button will not show on the payment selection screen.
Are there recommended best practices?
-
- Any payment that is accepted in-store or on POS should be set to YES (e.g., gift certificate, paper check, hotel charge).
- Any payment intended solely for use by our APIs is set to NO (e.g., Grubhub).
Back to top
Additional Resources
Back to top

