Kiosks can help cut down on lengthy lines, optimize your labor efficiency, and allow guests to customize their orders easily and efficiently.
In this Article:
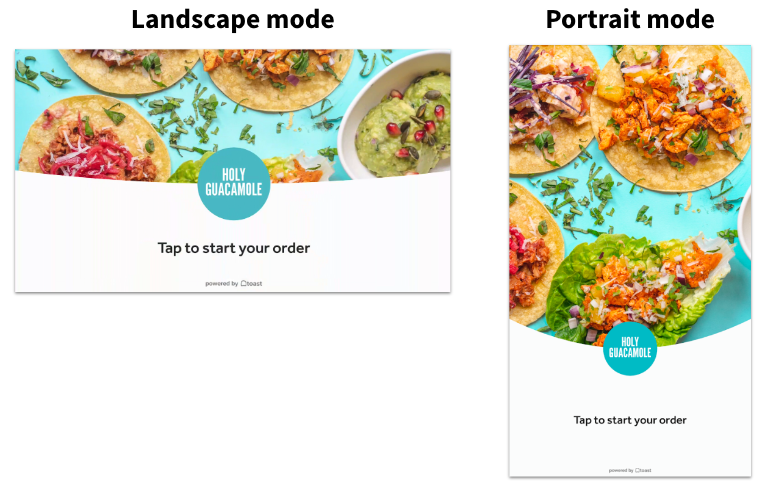
We've updated our kiosk to make it quicker and easier for your guests to use. The new, contemporary interface also brings highly requested improvements, including better menu presentation, smoother navigation, an enhanced loyalty experience, promo codes, and the ability to configure multiple service charges. It also gives you the ability to use your kiosk in portrait orientation. With the new kiosk experience, your kiosk will continue to work for guests in offline mode.
Note: We do not recommend using a 22” ELO device in portrait orientation with a tabletop mount. Use of the 22’ ELO device with a tabletop mount in portrait orientation may result in the collapse of the device, causing possible injury and/or property damage.
Along with the new kiosk experience, we've redesigned the Kiosk setup page in Toast Web to make it easier to customize your kiosk configuration. If you see this blue banner at the top of the Kiosk setup page, select the link to visit the new page and follow the instructions in this article to select your settings:

Back to top
Your kiosk display can be customized to improve the first impression your guests have of your kiosk and to better fit your restaurant's branding.
You can customize your kiosk design in the following ways:
- Add a custom welcome screen background image.
- Choose a brand color that will be used with various gradients for buttons and icons.
- Determine whether you want to show the order number on the order confirmation screen.
Note: The Powered by Toast logo will appear on the bottom center of your kiosk screen and is not customizable.
- On the Kiosk setup page, navigate to the Design your kiosk section.
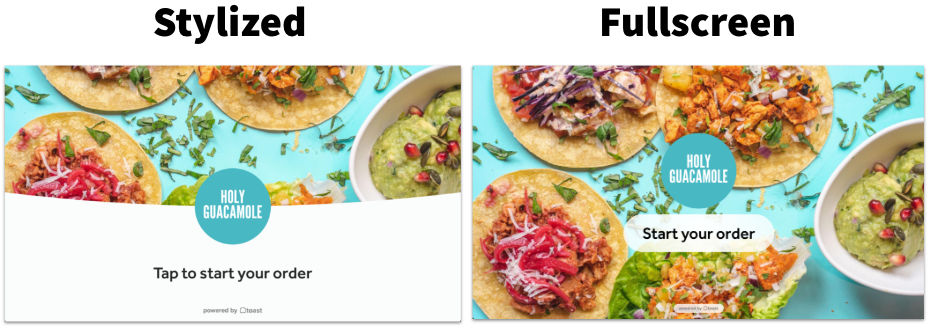
- Choose your desired setting for Which version of the welcome screen would you like to use?
- Stylized welcome screens will show your restaurant's background image slightly cropped, with your logo in the center.
- Fullscreen will place your image on full display.
- This setting is in limited release with select customers. If you don't see it at the top of the Design your kiosk section, check back soon for updates!
- Select + Add image for the Welcome screen background image setting to upload a photo from your computer. This image will appear on the start screen when a guest arrives at the kiosk to place their order. If no image is uploaded, the background will remain white with your restaurant logo in the center.
- Image Recommendations:
- A high-quality image, no larger than 10 MB
- For 15" Kiosks: 800x450
- For 22" Kiosks: 1920x1080
- Now choose a Brand color by selecting the color rectangle to enter a hex code or use the color picker gradient. Button text color is set dynamically based on the lightness/darkness of the button color selected to ensure readability.
- If desired, toggle Show order number on order confirmation screen to the On position.
- When finished, be sure to publish your changes.
Back to top
If you've uploaded a logo to your Restaurant Information page, your logo will also appear on your kiosk start screen. If you haven't yet, follow the optional steps below:
- In Toast Web, navigate to Takeout & delivery > Toast order sources > Restaurant info.
- In the General Information & Branding section, find the Restaurant Logo setting and select Choose Image to upload your logo. Be sure to choose a high-quality image, no larger than 5 MB.
- Publish your changes.
Back to top
The next section of the Kiosk setup page allows you to configure your Menu options for your kiosk. Configure the following settings as desired:
- Show item descriptions. Toggle this setting On to show menu item descriptions in the list view on your kiosk. Leaving it off will display images only. Descriptions will always be visible when viewing item details on a kiosk.
- Hide out of stock items. Toggle this setting On if you want sold out items to be hidden from your guests when ordering on a kiosk. Leaving this setting off will display out-of-stock items with a "sold out" label on them.
- Accept special requests. Toggle this setting On to allow guests to type in additional modification instructions for menu items. You'll be able to add Special request instructions that will appear on your kiosk.
- Upsell items. Create a list of items to promote to your guests before they check out. You can add up to six menu items here.
When you're finished making changes, publish your changes to update your kiosk.
Back to top
Your kiosks will accept credit and debit cards by default. If you want to add gift card or cash payment options, or enable tipping, follow the steps below.
- In Toast Web, navigate to Front of house > Mobile dining solutions > Kiosk setup, then scroll down to or select the Payments, tipping, and voids section.
- To accept cash for kiosk orders, toggle Cash payment option to the On position.
- When cash payments for kiosk are enabled, you'll be able to choose how orders are sent to the kitchen when a guest is paying with cash:
- When the guest prints their receipt (before they complete payment with a cashier), or
- After the guest completes payment with a cashier
- You'll be able to add Cash payment instructions that appear on the receipt that a guest prints at the kiosk when choosing to pay for their order in cash.
- To take gift card payments on your kiosk, toggle the Gift card payment option setting to the On position.
- To accept tips on your kiosk, toggle Tipping screen to the On position.
- If you choose to show the tipping screen, you'll see the option to enter your desired tipping percentages for kiosk. All guests will have the option to input a custom tip, or no tip. Note: The tip setup for the kiosk is separate from the other tip setup in Toast Web.
- If needed, Service charges can be applied to orders made on a kiosk. Select any Service charges you'd like to apply to kiosk orders.
- Select a Void reason that will be attached to any kiosk orders that are voided due to time-out or error.
- Publish your changes.
For more information on placing orders, setting up payments, and tipping for the Toast Self-Ordering Kiosk, check out this Toast Central article: Kiosk: Place Orders and Make Payments.
Note: Scanners in the kiosk workflow only support reading barcodes and QR codes. Scanners won’t work with loyalty or third-party payment integrations like Levelup, which use the camera on the kiosk. At this time, scanners are only available to restaurants located in the U.S.
Back to top
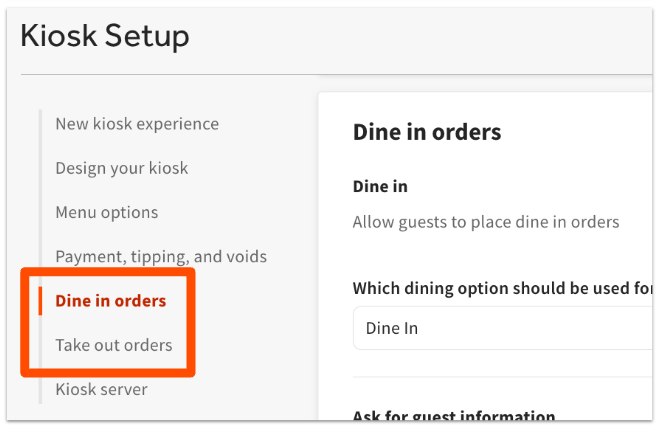
You can configure your kiosk to accept dine in orders, take out orders, or both.
- On the Kiosk setup page, scroll down to Dine in orders or Take out orders and turn the toggle On to access the order settings. You can follow the steps below for both types of orders.
- Select which dining option should be used for dine in/take out orders on kiosk. Don't see the option you're looking for? See Set Up Custom Dining Options.
- If you'd like to prompt your guest to enter a name, table number, pole number, or other identification marker for their dine in or take out order, toggle Ask for guest information to the On position.
- Mark this action as Required or Optional (they can skip this step).
- Add your Guest information instructions, which will be displayed on the kiosk when a guest places an order.
- If your restaurant uses the Kitchen Display System (KDS), you can toggle Ask for a phone number to the On position to collect your guest's phone number for an order ready text message.
- Mark this action as Required or Optional (they can skip this step).
- Add your Phone number instructions, which will be displayed on the phone number screen.
- Publish your changes.
If both Dine in and Take out dining options are enabled, your guests will be prompted to select a dining option when they start to place an order.
Back to top
In the Kiosk server section of the Kiosk setup page, select a server that all kiosk checks will be assigned to. This could be a manager or a staff member working in that particular area, or it's common to create a user specifically for this situation. It could be a user named "Kiosk Server" with a passcode that is shared with staff. This way, any staff member can punch in as the kiosk user to help a customer with their kiosk order if necessary.
Otherwise, you may encounter an error message that states "A server is needed to use kiosk."
For instructions, check out this Toast Central article: Kiosk: Set Up Authorization.
Back to top
Once you're on your kiosk, some settings can be adjusted via Device Setup within the Toast app. To access Device Setup, you'll need to exit Kiosk mode. For instructions, see this Toast Central article: Use Kiosk Mode on Your Terminal.
Back to top
Back to top

