In this Article:
In order to start an order (start a tab) on the POS, you need to have POS access permissions for their job or employee account, specifically
1.1 Table Service Mode and/or
1.2 Quick Order Mode. Learn more in our
Permissions Reference Guide.
Add Items to an Order
From the order screen, begin by selecting the button for the menu you'd like to select an item from. In this example, our customer would like to order the Carne Asada so we select the Food > Entrees buttons.
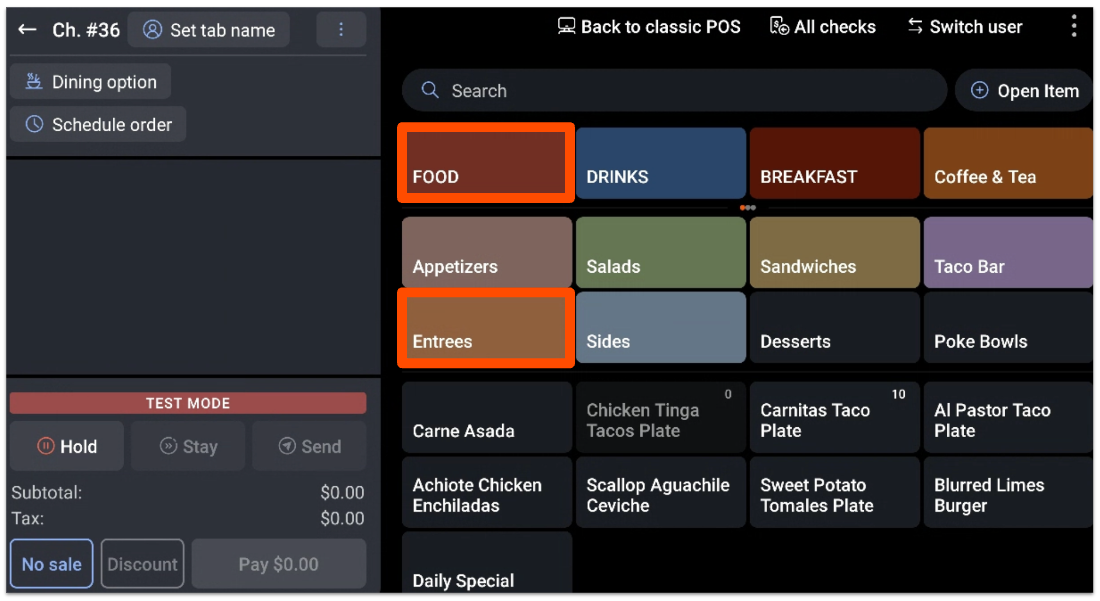
Note: The Menu buttons reflect how your restaurant's menu has been configured and will differ from the example.
We can now select the Carne Asada to add to the order, which then prompts us to select a side. In this case, we have chosen Seasoned Rice. Then, select Done.
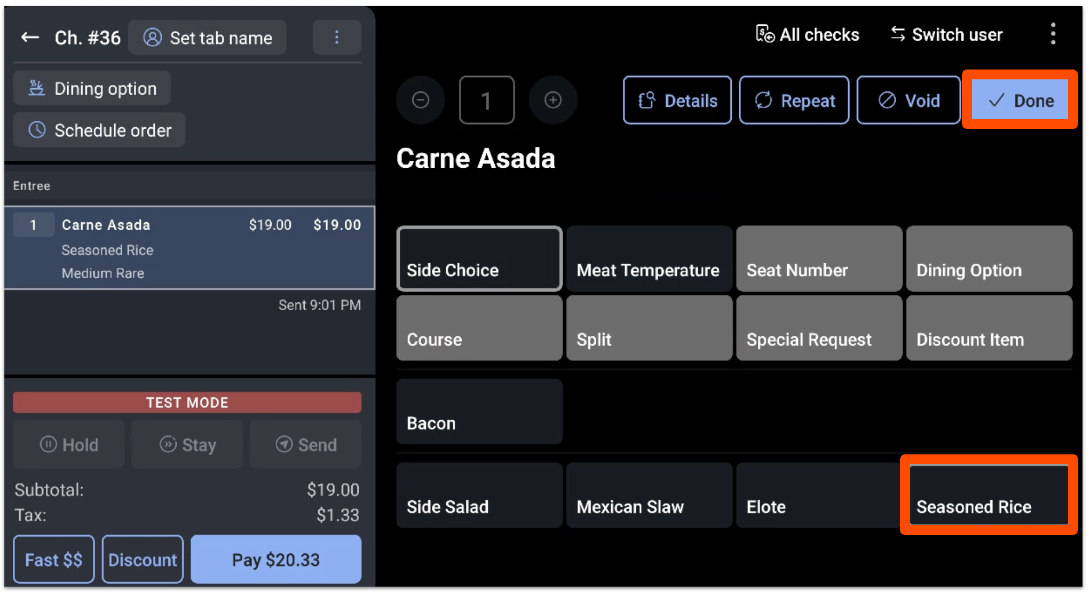
As we navigate back to the order screen, we see that the Carne Asada is now added to the order.

We can continue adding any other items the customer would like by selecting the menu buttons.
Back to top
Send an Order
When the customer is finished placing their order and you're ready to send it to the kitchen for preparation, you can select Hold, Send, or Stay.
To learn more about Server item firing and the Hold, Send, and Stay buttons, check out the article Difference Between the Send, Stay, and Hold Buttons.
Back to top
Repeat an Ordered Item on a Check
You can quickly repeat an item on a customer's check.
First, bring up the customer's check and select the item they have already ordered and wish to repeat. The quantity is default set to 1 for the repeat function, but you can adjust it as needed.
Select Repeat to add the item selected to the order again.
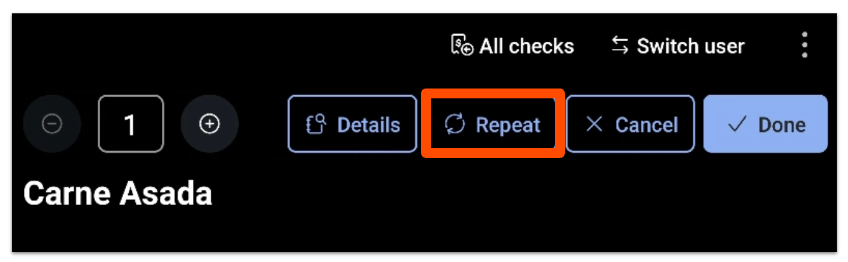
Select Send when you are ready to fire unsent items to their prep stations.
Back to top
Create a New Order from the Payment Terminal
Often, bartenders use the Payment Terminal as their primary mode to quickly manage the customers at the bar as well as new customers. Given the number of open tabs in this environment, creating an order from the Payment Terminal is optimal for speed and efficiency behind the bar.
A Paid check means that a credit card has been swiped, but the check hasn't been closed yet and a tip hasn't been added. A Closed check means that the check has been adjusted to its final amount, meaning a tip if applicable has been added and the check has been adjusted for its final amount. By the end of the day, any Paid check credit card payments will be captured even if the check hasn't been completely closed. The check will be closed once captured at the end of the day.
Advanced filtering is an easy and efficient way to sort and filter all of your checks for the day. Here, you can filter or sort your checks any way you'd like by oldest, most recent, check number, table number, or even dollar amount owed.
Back to top
Send an Order Only After the Check is Paid
You can enable a setting that allows you to send orders to the kitchen only when the guest's check has been paid in full. You can configure Send order after the check is paid in Toast Web here (you must be logged in to view this link).
- Once you are in Toast Web, navigate to Front of house > Order screen setup. These settings will affect the order screen experience for Table Service and the Quick Order screen.
- Scroll down until you see Send order after check is paid and toggle it to On to enable this feature.
- Save and publish your changes.
 |
Send order after the check is paid does not work with any orders that have a dining option that has a takeout or delivery dining behavior attached to it.
|
Back to top

